I recently got a request from a group of my friends to do a live streaming on YouTube. I did this long time before on my Mac. I thought that it should be easy, even though I still decided to do preparation one week ahead of time. I could not get it to work at start. I have spent several days struggling to figure out how to stream video and audio to YouTube. Finally, I got it work. Here I would like to make some notes on this experience.
What I need for Live Streaming
YouTube raised bar to do live streaming for mobile devices, at least 1,000 subscribes for the time being (Dec 10, 2019). I have to do it with software on my Mac. Here is the list I have to set up:
- Live streaming software: OBS (Open Broadcaster Software);
- Web camera as movable camera to shoot: EpocCam for iPhone to shoot, and EpocCam View on Mac to receive video from EpocCam on iPhone;
- External microphone for audio recording.
and of course, YouTube account is requested to do live streaming. Another thing is that Chrome is required to run Live YouTube, since Safari does not support some features by Live Y.
iPhone as Web Camera
EpocCam iPhone Webcam Viewer is a Mac app, which can be obtained from App Store. On iPhone side, you can also get EpocCam iOS app. In order for Mac to get video source, run the iOS app first, and then run the Mac app on my Mac computer. Both should be on the same network. This is very easy and straightforward step up.
OBS Configuration for Video Source
OBS installation is very easy as well. For Catalina OS, you may experience some issue to run the installation package since it is not from from App Store. Open System Preferences | Security & Privacy, and you will see in General tab that installation... for permission.
Catalina OS has more security features, thereafter, capturing screen/windows, and accessing to a mic have to be permitted by user.
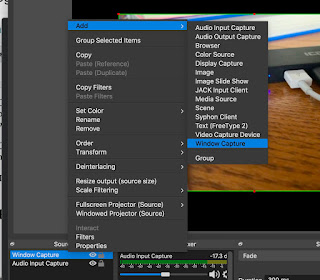
The first difficulty is to get video source for OBS streaming. After one or two days's investigation I eventually found a way to get video source: window capturing. This can be set by adding video source from source panel:
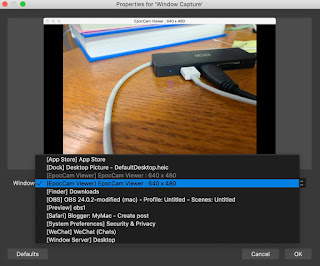
EpocCam running window can be found in window list:
OBS Configuration for Audio Source
The most difficult one is to configure audio source. Before set it up, the following app should be installed first:
iShowU Audio Capture
Basically, this app is used to install a driver as extension to OS X so that it can used as a way to capture audio on Mac computer. The installation process requires to give permission from System Preferences | Security & Privacy.
The next step is to set up audio output device by running Mac utility app: Audio MIDI Setup. Add a new Multi-output Device from left panel:
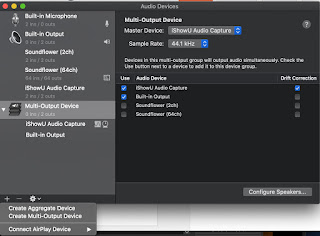
above is the case of Multi-Output Device with iShowU Audio Capture and Built-in Output checked.
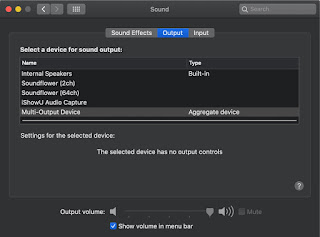
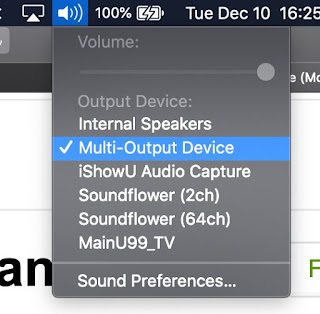
Remember: each time start a live OBS streaming, make sure this Multi-Output Device is selected as output device either from System Preferences | Sound Output tab, from top right Speaker icon:
or
The final and very important step is to start OBS from Terminal with the following command(audio capture would not work if launching OBS directly from Applications!):
open /Applications/OBS.app/Contents/MacOS/OBS --args -picture
When you first time to run this command from Terminal, you will get permission prompt to let this shell to access mic. I think that access to microphone is done by running OBS with argument settings from Terminal. You can verify it by looking at Audio Mixer penal on OBS window's bottom.
Don't close Terminal during live streaming period!
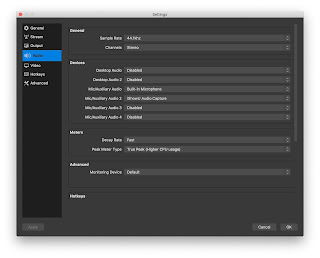
This is my OBS settings for Audio:
The above are all my findings after several days and long hours struggling. I am very happy to get all the issues resolved.
I wrote this blog for my future reference and hope it may help you with similar difficulties.
References


